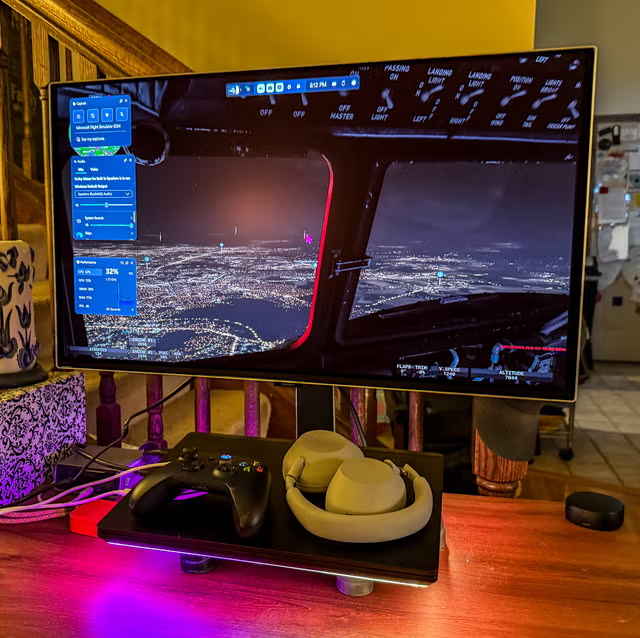
How To Build A Gaming Pc is explained in this practical, step-by-step guide with clear recommendations, comparisons, and real gaming examples.
AEO Quick Answer
To build a gaming PC, choose a compatible CPU, motherboard, GPU, RAM,
storage, power supply, case and cooler; assemble the core parts on the
motherboard; mount them in the case; connect power and storage; install
the GPU; verify the system in BIOS; install the operating system and
drivers; then test temperatures, stability and game performance.
This guide targets the search intent behind “how to build a gaming
PC” with practical explanations, comparison points, gaming scenarios,
and buying or optimization advice that can be applied without relying on
hype.
Before You Buy
Anything: Define the Gaming Goal
A successful gaming PC starts with the games, resolution and refresh
rate you want to target. A system intended for 1080p esports has
different priorities from one designed for 4K single-player gaming or
simultaneous streaming. Write down your target games, desired visual
quality, monitor resolution and total budget before choosing
components.
Check the recommended requirements of demanding games you expect to
play. Then leave some room for future titles and background
applications. This approach prevents two common mistakes: overspending
on one component while starving another, and buying parts that are
individually powerful but poorly matched.
Core Components You Need
Every gaming desktop needs a CPU, compatible motherboard, memory,
storage, power supply, case and cooling. Most performance-focused builds
also use a discrete GPU. Intel’s official building guide emphasizes
compatibility, budget and system requirements before purchase, and lists
these same core component categories.
The CPU handles game logic and general processing; the GPU renders
graphics; RAM holds active working data; the SSD stores the operating
system and games; the motherboard connects everything; and the PSU
converts wall power for the components. Cooling keeps temperatures under
control so hardware can maintain expected performance.
Step 1: Choose
the CPU and Motherboard Together
Start by selecting a CPU platform, then a motherboard with the
correct socket and chipset support. Confirm compatibility on the
motherboard manufacturer’s support page, especially if a BIOS update may
be required. Check memory type as well: DDR4 and DDR5 modules are
physically different and cannot be used interchangeably.
Do not pay for motherboard features you will never use. Focus on
adequate power delivery, enough M.2 storage slots, the USB ports you
need, networking, expansion slots and a form factor that fits the case.
ATX offers expansion room, while microATX can reduce cost and size.
Step 2: Select
a GPU That Matches Your Resolution
The graphics card is often the largest performance expense in a
gaming build. At 1080p, a midrange GPU may be enough for high frame
rates depending on the title and settings. At 1440p or 4K, graphics
demand rises sharply. Compare independent benchmarks for the actual
games you play rather than relying only on model names.
Balance the GPU with the monitor. If your goal is competitive 1080p
at high refresh, consistent high FPS may matter more than maximum
ray-tracing quality. If you play cinematic titles on a high-resolution
display, visual features and VRAM requirements may receive more
budget.
In-Blog Image: Quick checklist for the main decision points in this
guide.
Step 3: Choose RAM,
Storage and Power Supply
For a modern gaming PC, 16 GB of RAM is a practical baseline, while
32 GB provides more breathing room for demanding games, heavy
multitasking, modding and content creation. Use a matched kit and
install it in the motherboard-recommended slots. Enable the supported
memory profile in BIOS only after the system is stable.
An NVMe SSD makes Windows, applications and game loading feel fast.
Capacity depends on your library; large modern games can consume
significant space, so 1 TB is a comfortable starting point for many
builds. For the PSU, use a reputable unit with enough wattage for the
CPU and GPU plus sensible headroom. Never choose a power supply purely
because it is cheap.
Step 4: Prepare a Safe
Workspace
Use a large, clean, well-lit table and avoid working on carpet where
possible. Keep a Phillips screwdriver, component manuals, cable ties and
a USB installer ready. Handle circuit boards by the edges and avoid
touching contacts. Keep drinks away from the workspace.
Before assembly, inspect the motherboard manual. It tells you the
recommended RAM slots, M.2 positions, front-panel connector layout and
CPU cooler mounting details. Ten minutes with the manual can save an
hour of troubleshooting.
Step 5: Install CPU,
M.2 SSD, Cooler and RAM
Place the motherboard on its box or another safe nonconductive
surface. Open the CPU socket, align the processor using the marked
corner and lower it into place without force. Lock the retention
mechanism. If your M.2 slot is easiest to access before the motherboard
enters the case, install the SSD now.
Install the CPU cooler according to its manual. Use the pre-applied
thermal compound if provided; otherwise apply the amount recommended by
the cooler or CPU guidance. Then install the RAM, making sure the notch
aligns correctly and the modules click fully into place. Partially
seated memory is one of the most common causes of a new PC failing to
boot.
Step 6:
Prepare the Case and Install the Motherboard
Check that motherboard standoffs match your board’s form factor.
Install the I/O shield if it is not integrated. Mount case fans in a
sensible airflow pattern, generally bringing cool air in from the front
or bottom and exhausting warm air from the rear or top.
Lower the motherboard into the case carefully, align the ports and
screw holes, and secure it without overtightening. Connect the 24-pin
motherboard power and CPU power cables. Route cables through the case
cutouts to keep the main chamber clear.
Step 7:
Install the PSU, GPU and Remaining Storage
Mount the PSU with its intake fan facing a ventilated opening when
the case design allows it. Connect only the modular cables you need.
Install 2.5-inch or 3.5-inch drives if your build uses them, then
connect SATA data and power as required.
Remove the correct expansion-slot covers, unlock the motherboard’s
main PCIe slot and insert the graphics card firmly. Secure it to the
case and connect the GPU power cables exactly as specified by the PSU
and GPU manufacturers. Large graphics cards may benefit from an anti-sag
support.
Step 8:
Connect Front-Panel Cables and Do a Final Check
Connect the case power switch, reset switch, power LEDs, USB ports
and front audio header using the motherboard diagram. These tiny
connectors are easy to misplace, so work slowly. Connect case fans to
appropriate fan headers or a supported hub.
Before powering on, confirm that no loose screws are inside the case,
CPU and GPU power are connected, RAM is fully seated, the CPU cooler fan
or pump is connected, and the monitor cable is connected to the graphics
card when using a discrete GPU.
Step 9: First Boot,
BIOS and Operating System
Power on the system and enter BIOS or UEFI. Confirm that the CPU,
total memory and storage are detected and check idle temperatures. Set
the USB installer as the temporary boot device and install the operating
system. Intel’s guide recommends verifying component recognition in BIOS
before completing setup.
After Windows installation, run system updates and install current
chipset, network and graphics drivers from official sources. NVIDIA’s
Game Ready program, for example, provides drivers tuned and tested for
games and supported hardware. Avoid random driver-download websites.
Step 10: Test
Stability Before You Celebrate
Install monitoring software from reputable vendors and watch CPU and
GPU temperatures during games. Run several real games you know, because
gaming workloads reveal practical issues such as crashes, stutters, fan
noise and unstable memory profiles. A benchmark can supplement this
testing, but it should not be the only test.
If the system crashes, return settings to defaults before assuming
hardware is defective. Reseat RAM and power cables, verify temperatures
and update firmware or drivers where appropriate. Change one variable at
a time so you can identify the cause.
Gaming Example:
A Sensible 1440p Build Strategy
For a 1440p gaming system, allocate a large share of the budget to
the GPU, choose a CPU strong enough to keep frame rates consistent, use
32 GB of matched RAM if budget allows, and install a 1 TB or larger NVMe
SSD. Pair it with a quality PSU and airflow-focused case rather than
spending heavily on decorative components.
This balanced approach can handle games such as Fortnite, Apex
Legends, Baldur’s Gate-style RPGs and many modern AAA releases without
making one premium part compensate for weak supporting hardware.
Cable Management and Airflow
Good cable management is not just cosmetic. Thick bundles placed
directly in front of intake fans can obstruct airflow, and loose cables
can touch fan blades. Route excess cable behind the motherboard tray
when the case allows it, use Velcro straps or ties, and leave gentle
bends rather than forcing connectors.
Do not pull power cables tight. The goal is secure routing without
mechanical stress. After the first week of use, open the side panel and
verify that nothing shifted into a fan.
Upgrade Planning
A custom PC becomes more valuable when upgrades are easy. Leave an
available M.2 slot if you expect the game library to grow, choose a PSU
with reasonable headroom, and avoid a case that barely fits the current
GPU if future cards may be larger. Four RAM slots can be convenient,
although matched memory kits remain preferable.
Future-proofing has limits. Paying a large premium for features you
may never use can be wasteful. Build for today’s target with one or two
realistic upgrade paths rather than trying to predict every hardware
generation.
Quick Comparison Table
| Component | Main job | What to verify |
|---|---|---|
| CPU | Game logic and processing | Socket, cooling, performance |
| Motherboard | Connects components | Socket, RAM type, slots |
| GPU | Renders graphics | Case clearance, PSU, target resolution |
| RAM | Active working memory | DDR type, capacity, supported speed |
| SSD | Stores OS and games | M.2/SATA interface and capacity |
| PSU | Supplies power | Quality, connectors, wattage |
| Case | Houses hardware | Form factor, GPU/cooler clearance |
| Cooler | Controls CPU temperature | Socket support and case clearance |
Related Gaming Guides
Best Gaming Accessories for PC Gamers: Complete 2026 Setup Guide, Best Gaming Laptops for Students: What to Buy for Study and Play in 2026, How to Improve Gaming Performance on PC: FPS, Latency and Stability Guide, Best Gaming Monitors for Competitive Gaming: 2026 Buying Guide.
External Authority Links
Frequently Asked Questions
Is building a
gaming PC hard for a beginner?
It is manageable if you follow component manuals, verify
compatibility first and work slowly. Most parts are designed to fit only
in the correct orientation.
How much RAM should a
gaming PC have?
16 GB is a practical baseline for modern gaming, while 32 GB is
useful for heavier multitasking, demanding titles, modding and creation
workloads.
Do I need an expensive
motherboard?
No. You need a compatible motherboard with adequate connectivity,
power delivery and expansion for your build.
Can I build a PC
without a dedicated GPU?
Yes if the processor includes integrated graphics, but demanding PC
gaming generally benefits greatly from a discrete GPU.
What should I do after
building the PC?
Check BIOS detection and temperatures, install the operating system,
update official drivers, enable the correct monitor refresh rate, and
test stability in real games.
Final Takeaway
The best answer to how to build a gaming PC depends on matching
hardware and settings to real gaming needs. Start with your target
games, budget and performance goal, prioritize the parts or settings
that remove the biggest limitation, and verify results with real use. A
balanced setup usually delivers a better experience than chasing one
impressive specification while ignoring comfort, compatibility, thermals
or display capability.